


How To
Instructions
All of our grow kits are “Ready-to-grow.” They do not require any intervention or additional handling. Simply place the kit and observe the colonization of the mycelium. However, it should be noted that the conditions favorable for colonization are the same as those for fruiting. Therefore, careful observation is required to prevent mushroom growth. This is an illegal activity.
Unpacking
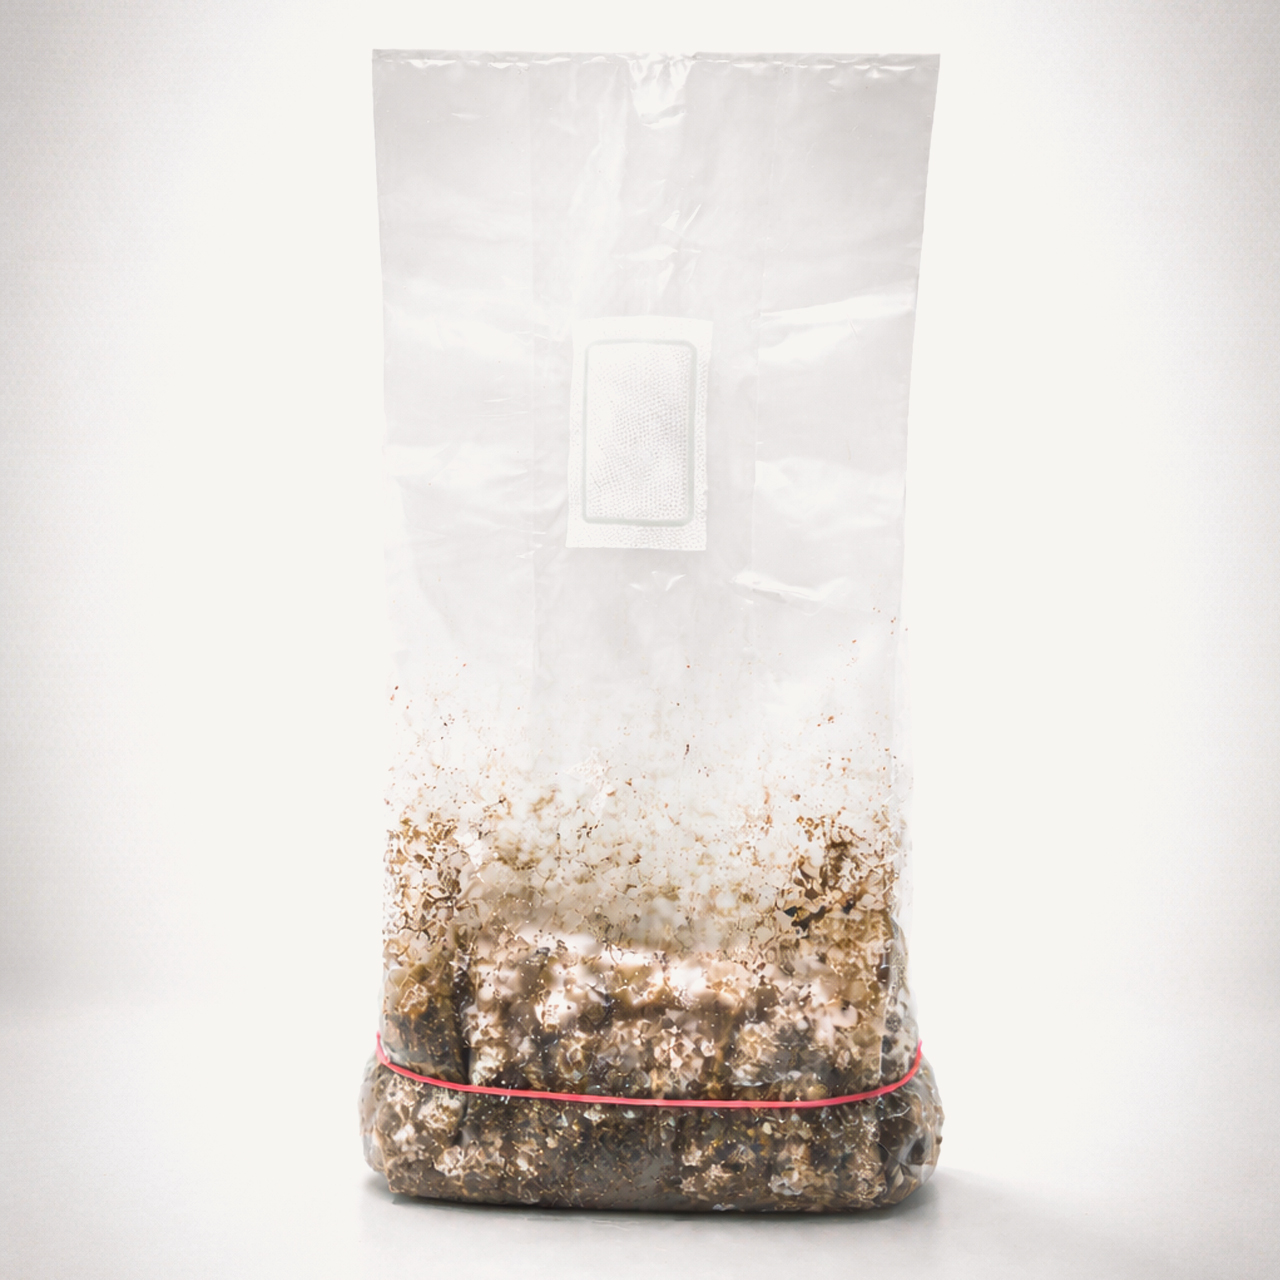
Upon receiving the product, the grow kit may be cracked. It should be gently arranged into the desired form.
Filter
Make sure the bag is upright and that the filter inside does not touch the back side of the bag.
Band
The green or red band is used to simulate the soil surrounding the mycelium in natural conditions and should remain in place.
Colonization process
A white coating appearing on the “cake” is a natural part of the colonization process (it is not mold) and will gradually spread over the entire surface.
The grow kit must not be placed in a refrigerator, cut open, flooded with water, or used with a heating mat.
Make sure the bag is upright and that the filter inside does not touch the back side of the bag.
The band is used to simulate the soil surrounding the mycelium in natural conditions and should remain in place.
A white coating appearing on the “cake” is a natural part of the colonization process (it is not mold) and will gradually spread over the entire surface.
Upon receiving the product, the grow kit may be cracked. It should be gently arranged into the desired form.
The cut beneath the filter must not be sealed

Its better to not place growkits next to plants or flowers, especially during the spring and summer seasons when fungus gnats hatch in plants.
The grow kit should be kept in a shaded place at a temperature of 20–25°C.
It is important that growkit remains in a ventilated area (we advise against keeping it in closed cabinets, boxes, basements, etc.).
We advise against placing the grow kit near a radiator or any other heat source, as this may cause the mycelium to dry out.
The grow kit must not be placed in a refrigerator
This is good home for your Growkit
Home for your Growkit
Find proper place
The grow kit should not be placed near plants or flowers, especially during the spring and summer seasons when fungus gnats hatch in plants. There is a risk they may enter the mycelium through the cut beneath the filter, which must not be sealed
Temperature
The grow kit should be kept at a temperature of 20–25°C, as the mycelium develops best within this range. Small fluctuations are normal, and brief exposure to different temperatures, for example during shipping, will not negatively affect the mycelium.m develops best within this range.
Airflow
The grow kit should be kept in a well-ventilated area. Avoid placing it in closed spaces such as cabinets, boxes, or basements.
Limited airflow to the filter can slow colonization and may sometimes lead to blob formation
Heat sources
We advise against placing the grow kit near a radiator or any other heat source, as this may cause the mycelium to dry out.
Do not
Do not open the grow kit during the process. Avoid adding water, ventilating it, or placing it on a heating mat, as this may disrupt the conditions needed for proper development.
The information provided is for educational purposes only.
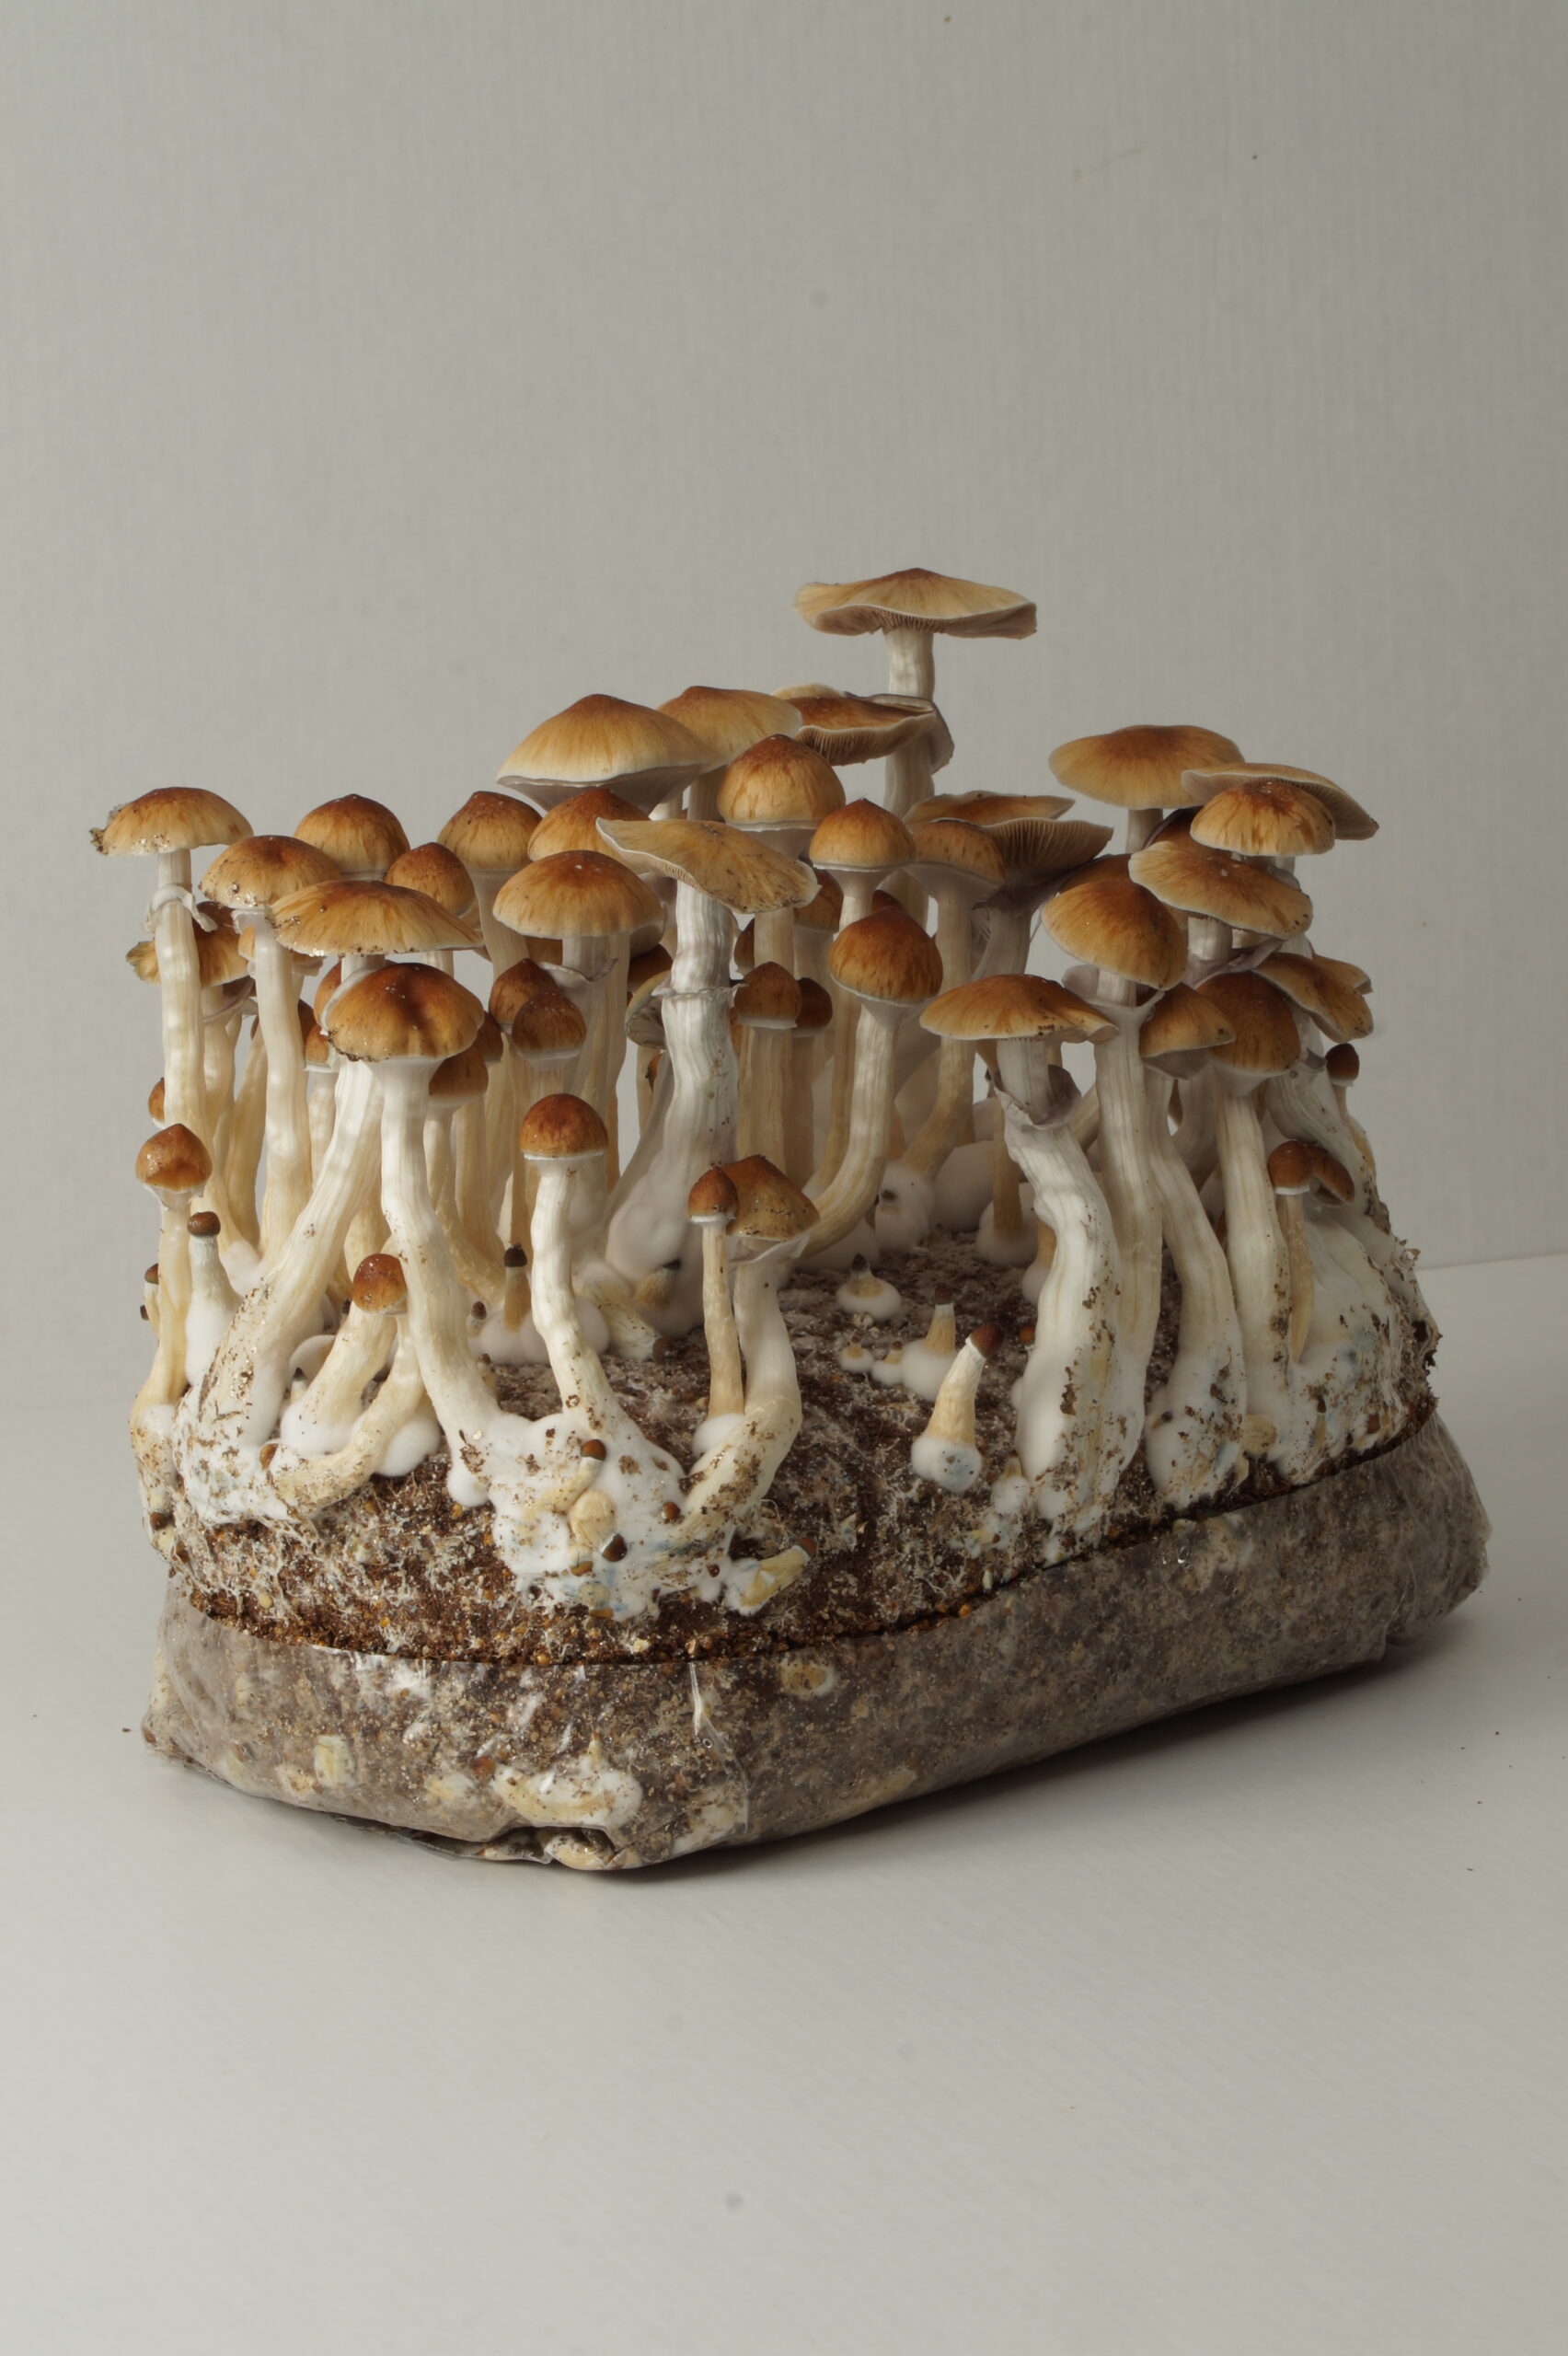
Harvest
Keep things as clean as possible during this step. If you can, wear gloves and a mask, and disinfect them with alcohol before handling the kit.
1
After around 20–30 days, you will start to see primordia forming. These will develop into pins, and eventually into fully grown mushrooms.
2
Each product page includes guidance on how to assess when the mushrooms are ready to harvest.
3
When it’s time, remove the rubber band and cut open the bag at the top seal. Yes — this is the moment.
4
Gently take out the substrate and harvest the mushrooms by carefully twisting them off.
5
Once done, place the substrate back into the bag and spray it with water. Be generous, but avoid letting water collect in pools on the surface.
6
Lightly roll the bag and close it, for example with clips, then place the rubber band back in its original position.
The kit is now ready for the next flush.
Do it as clean as you can.
At home, this part is always a bit of a lottery.
You’re not in lab conditions — just trying to reduce the risk.
The better you do it, the more likely it is to work.
The substrate you’re working with is strong — it originally weighed close to 2 kg. With the right handling and a bit of luck, it can produce multiple flushes, sometimes up to five.
Additionally, please note that:
If you suspect that your product is contaminated, report it immediately.
Complaints regarding the presence of insects are never accepted. Their occurrence excludes the production process as the source.
Reports should be sent to: contact@mykolab.eu. The message must include photos of the mycelium, the bag seal, and the product label.